 I recently posted a picture on Twitter showing the volcanoes my students created with expandable foam. I first saw this idea at the TeachMeet Science event (#TMWA_Science) and decided that this would be perfect for my students. I remember making the papier mache volcano when I was at school... just seems like a dated idea now.
 We have been exploring the landscapes around the volcanoes as well as the layers of the volcano. Students were also very interested in the history of volcanic eruptions. The decision was then made to explore and create some of these venues.
As soon as I mentioned the idea to my Year Six class they were eager to start. I purchased 6 regular size tins ($7 each) from Bunnings, thinking that one tin per group would suffice. In fact, each group needed approximately two small tins or one of the large tins ($12 each). Knowing my luck, I only found the large tins once we had already started. They were at a larger Bunnings store.
Students made lists of other materials they would like to use to create their volcanoes and landscapes. These materials included:

- air drying clay
- wool (green and brown colours)
- sand
- hot glue gun and glue
- PVA glue
- paint (green, brown, blue, grey, yellow, red and white)
- tissue paper (green)
- tooth picks
- corrugated paper
 I needed to work with one group at a time to build the volcano with the expandable foam. Whilst I did this, the other five groups created bits and pieces for their landscapes. They made little houses, buildings, bridges, rocks / pebbles, mountains, trees, grass and bushes. The clay and the expandable foam was then left to dry and harden over night.
Once dry, some of the groups decided that they wanted their volcano to be larger or wanted to build up the landscape with the expandable foam. We did this and then they needed to dry again. The foam only takes approximately 30 minutes to be touch dry and 4 hours to be completely set.

 During the next lesson, students cut down any excess foam and finalised the shape of their volcano and landscape. They were then able to paint them. It was interesting to hear the discussions that stemmed from this, not only about the landscapes but also about the materials they were able to use. I always

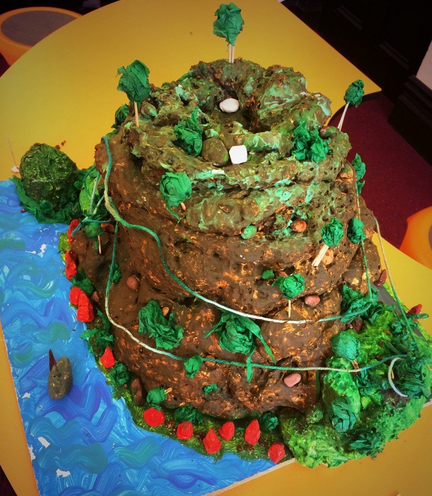
find that when I create a task like this and leave sections open to the children, they come up with the most amazing ideas. Students were mixing colours to show shading, putting sand in with paint to create rough surfaces and using the tooth picks for trees. They were then able to push these into the foam, therefore not needing to use glue.
The final creation session will include students gluing on buildings, bridges, houses, etc. Then the fun begins!! We will be making them erupt to see how their landscapes cope and what damage is caused. We will then be putting them through an earthquake, where we will shake them and, finally, we will put them through a tsunami. We are going to use a high pressure house to do this. I'm glad that I've taken lots of photos along the way because I doubt they will look the same after those ordeals.
The students had so much fun researching and creating these volcanoes. In my opinion, it was a whole lot easier than making them with papier mache, and much lighter. The foam ways practically nothing, as do the materials my students decided to use. The only heavy section is the wood they are sitting on. I would recommend that you use a thin ply wood rather than something as thick as I did (but I was recycling).
Feel free to comment below or get in touch on Twitter @GabrielleTrinca if you have any questions or queries. Enjoy x
No comments:
Post a Comment